
How to create a mood board
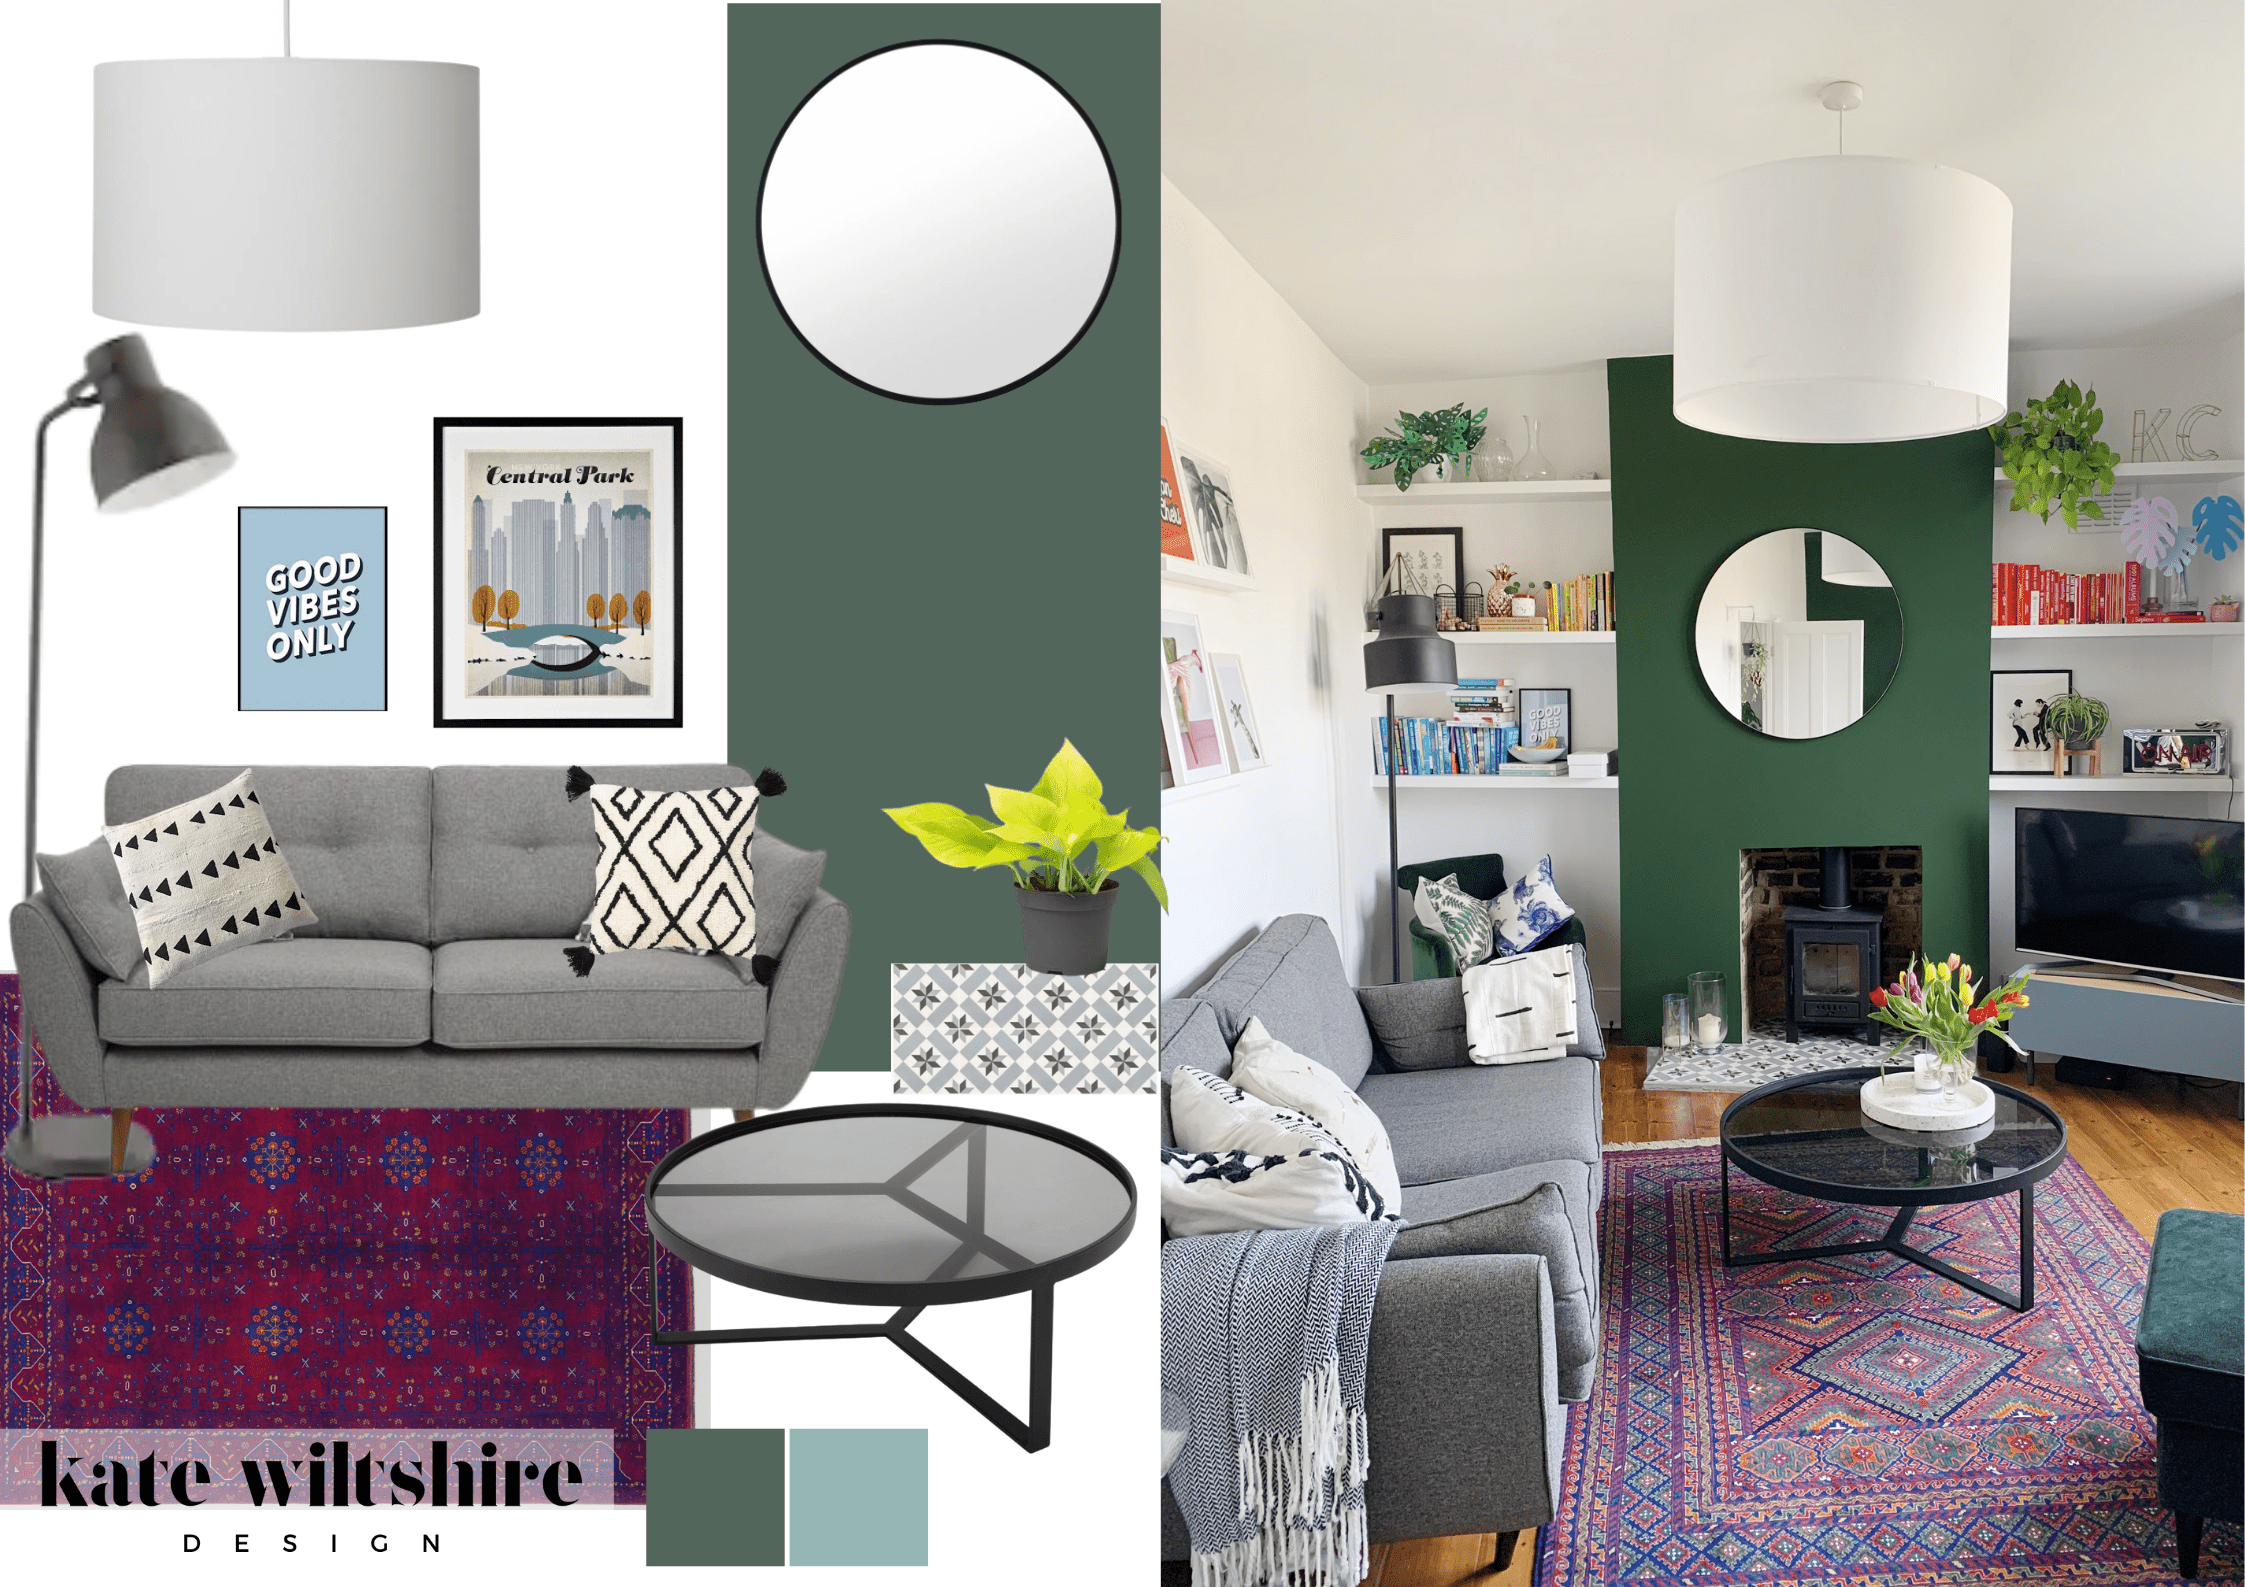
Side by side example of a mood board vs the finished product.
I am a massive fan of the mood board, they are an essential design tool! I use them constantly to communicate designs and bring a design to life. I’m going to tell you why they are so valuable, and how you can start making your own.
So what is a mood board? Essentially it's a visual tool that allows us to see how elements interact together, and to communicate our design ideas. You don't necessarily need to create them digitally, old school can be just as effective and allows you to see the true colour and textures of your elements. I do mine digitally purely because I find it quicker.

A mood board created for a client with a focus on textiles and colour.
Why mood board?
Mood boarding is a great way of just checking your ideas before you commit to anything. You can check a colour scheme doesn't clash, or check that a piece of furniture ties in with everything you already own before you buy it.
It's a great way of getting a sense of how cohesive your ideas are when they all come together in one space. I keep all of my mood boards in one place, so that I can see not only how cohesive individual rooms are, but how all of our rooms tie in together and create a flow throughout the house.
Another massive upside of mood boarding is to use it as a tool to sell your design ideas to your dubious other half!

A mood board I created for a client’s daughter’s room
The mood board process
There are a number of great tools online that will help you create a mood board. My favourite is Canva. These are the steps I take when creating a mood board.
Start your mood board on Canva. The “Poster (Landscape)” size is a good size for mood-boards (you don’t want it to be too small).
Go onto Pinterest, and find an inspiration image which will help you communicate the overall feel that you want your design to have. Add this to your mood board in Canva.
Think about the elements of your room that are staying; any furniture you know will be in the design, your floor boards, carpet, wall colour (if you’re not changing it). Add pictures of these to your mood board first, either by taking a photo of them and uploading it or googling for something similar.
Now for the fun bit - start looking online for furniture, patterns, wallpapers and colours that you like. It’s much easier to pick one thing (for example a sofa) first that you love, and then base the rest of the design onto it.
I usually start with the biggest parts of the room first - usually large bits of furniture and wall colour. Then you can build upon this, adding smaller items as I get further along.
While you’re adding to your mood board, keep checking that everything feels coherent. Are the colours a similar palette? Is the furniture a similar style? Do the textures and patterns complement each other?
Once you’re happy save your mood board so that you can refer to it in the future. When you want to buy things for your space, you can always add them into your mood board and check that it feels coherent before you commit to buying.

Another mood board inspired by weird art! Can you tell I like to use antique rugs yet?
I offer a number of design services which include creating mood boards for your room. Take a look at my services to see if I can help you with your project.